
Setup DigitalOcean postgreSQL cluster for Mastodon
Using a managed database service can simplify scaling your instance


This is a guide to setting up a PostgreSQL cluster on Digital Ocean for Mastodon. With the flood of users to mastodon, Digital Ocean has become one of the few easy options for quickly standing up a Mastodon server. In the spirit of no-code or lo-code, I was curious about what the options are for quick and sustainable Mastodon hosting. There are not many hosting services and those that were operating in 2022 (like masto.host) are currently refusing new subscriptions. This is a warning sign that there is non-trivial manual work involved in the setup and maintenance of Mastodon. Digital Ocean has become one of the most simple options because they have a one-click installer aka Droplet (found here). The catch is that the installer has embedded a PostgreSQL installation script that does not take advantage of a PostgreSQL cluster. Also, some of the fantastic install scripts that exist (like this) do not use a database cluster. Hence this post.
Why use a managed database cluster?
For a nascent mastodon administrator, a few of the reasons to use a managed database cluster include the following.
The managed database cluster automates nightly backups, whereas the single-click Droplet is set up for weekly backups.
By shifting to a cluster on DigitalOcean, one can allow scaling up Postgres and Mastodon using a point-and-click interface. For example, you can start with a single database server and then add a fallback server with a few clicks. You can also size up the server instances and connection pool.
Keep the database separate from the rest of Mastodon
Shift the burden for mundane database management tasks to someone else. We're keeping it as simple as possible.
Prerequisites
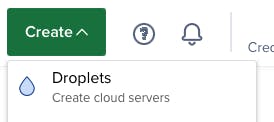
For Mastodon itself, you will need a separate virtual machine. From the project in DigitalOcean, use the big green Create button to create a Droplet in your region (e.g. SFO3) with Ubuntu 22.04 (LTS) , 2 Gb RAM, 2 CPU, 60 Gb SSD, 3 TB transfer or larger.
Add metrics and enable backups if you plan to go live. You can play with the CPU, RAM, and SSD sizing options but the specification above is an example of a minimal sizing that seems to handle a basic mastodon server.
Consider a adding reserved IP address, this will allow you to swap in another server without updating the DNS and disrupting your users due to slow DNS propagation across the internet. You can do this with a click from the console. You can do it later but you will want to put that reserved IP address into your DNS configuration. Once you have added that to DNS, then you could swap server Droplets without updating DNS, which is faster as DNS requires time to propagate.
Notice that this minimum-size Droplet comes with only 22 database connections which may or may not be enough for your intended purpose. Unfortunately, Mastodon uses a ridiculous number of connections. We can partially mitigate that by using connection pools (described below.)
Recapping the steps:
1.1 - Create the Ubuntu Droplet and click to open the Droplet control panel.
1.2 - Assign a reserved IP address to the droplet.
1.3 - If this is your first time only, copy the reserved IP address, and using your DNS service account, update the A record in the domain record to point to the reserved IP address.
1.4 - Using the Access link to the left, click 'Launch Droplet Console' to bring up a shell.
1.5 - You will need a mailer to handle password resets and notifications. A really good guide for using a postfix mailer with SendInBlue can be found here.
1.6 - Reminder - did you enable backups?
Setup the Cluster
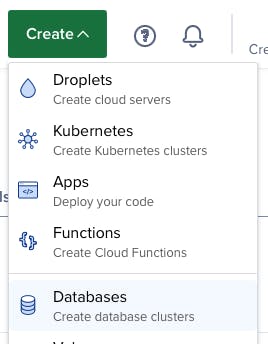
2.1 In the project, click 'Databases' to create a database cluster.
2.2. Choose a data center region. The data center region should be the same as the Ubuntu Droplet, e.g. SFO3 - this is important because these two systems need to be in the same virtual private cloud (VPC). This is necessary due to security and performance considerations.
2.3 Choose a database engine: PostgreSQL.
2.4 Choose a plan. Starter plan is fine. But notice the connection limits - this is a key part of their pricing. To get more connections you need to set up a connection pool, and in the future increase the size of the cluster.
2.5 Click the ‘Create Database Cluster’ button and wait for it to provision.
2.6 Under Trusted Sources, you can secure the database by restricting access. Add trusted sources for your local computer and the Ubuntu Droplet provisioned in step 1.
2.7 Change the upgrade window so scheduled downtime happens at the right time.
2.8 Observe the connection details. Note that we must create a new database; we should not use the default database.
2.9 If you have not already, finish going through the setup wizard and go to the ‘users and databases’ tab.
2.10 Add user name mastodon and click ‘Save’.
2.11 Add database mastodondb and click ‘Save’.
Configure PostgreSQL
As a first step, look at the following guides which cover the basic process is documented here with more help over here, and here. If you are not using a database cluster, the guide by Xiao Guoan (LinuxBabe) is all you need. Another similar guide is here.
3.1 Launch the console for the Ubuntu droplet you set up as a prerequisite.
3.2 Follow the script above to install PostgreSQL on the Ubuntu Droplet. Since we are using the Postgres cluster, we are installing PostgreSQL so we can access the remote database cluster, and we need the psql program installed locally.
After using the script, one extra step is required for the cluster configuration.
3.3 go to the database cluster overview page
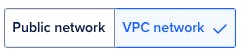
3.4 in Connection Details on the left, click ‘VPC network’
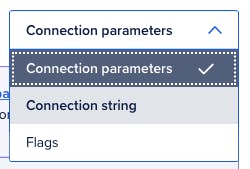
3.5 in Connection Details on the right, click ‘connection parameters’ and select ‘connection string’.
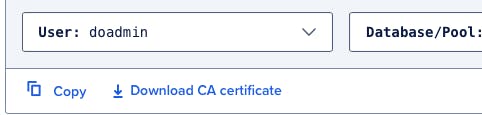
3.6 Select the user ‘doadmin’ and database ‘defaultdb’

3.7 Press the Copy button to copy the connection string
3.8 Switch over to the Ubuntu droplet console and type “psql ‘“ - note the space followed by a single quote
3.9 Paste in the connection string, add another single quote at the end, and then press the Enter key. Make sure the password is good. If it worked then you should see this prompt:
defaultdb=>
3.10 Add the Postgres database as follows:
doadmin> CREATE DATABASE postgres;
doadmin> \list
Without this, the mastodon installation script will fail.
3.11 Update the password for user ‘mastodon’ as follows
doadmin> ALTER USER mastodon WITH ENCRYPTED PASSWORD 'your_preferred_password';
doadmin> \q
An alternative is to do this from the control panel, but then the password will be given to the host. Make sure your password does not have special characters that might cause the console shell to have problems. I always automatically generate passwords, but this resulted in a password with an embedded ampersand; that did not go well.
In the console, in the row of the username is a menu with three dots “...”. Click that and you can reset the password. The mastodon database user password will be needed later, so add that to your password manager.
Connection Pools
I recommend creating a connection pool, but to do this, the mastodon database must first be visible in the Digital Ocean PostgreSQL console. I found I had to wait a little bit before adding this. It's very easy to add.
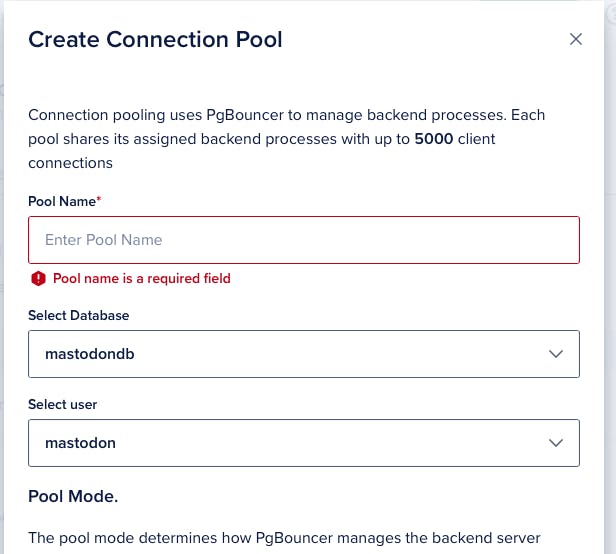
4.1 In the Digital Ocean database dashboard select the Connection Pools tab, and then click 'Create a connection pool'
4.2 Add the pool name.
4.3 Set the database to the mastodon database
4.4 Set the user to the mastodon user.
4.4 Set the pool size. The size of the connection pool should be one half of the maximum connections. So if you have the default 22 connections, the pool size should be 11.
4.5 Click 'Create Pool'
Trusted Sources
In the database Settings tab, you can control which Droplets can access this database. This is an important security measure. Scroll down to Trusted Sources, click 'Edit', and then add the Ubuntu Droplet as a trusted source, and click 'Save'. You can also define the window of time used for database maintenance in the Settings tab.
What's Next
At this point, you should have a fully functional, managed PostgreSQL database cluster that is set up and ready for use in a mastodon install. Fantastic! For more about using Mastodon on Digital Ocean, check out my other post: https://ericsfeed.hashnode.dev/use-mastodon-on-digitalocean-with-ubuntu